
Using InfoScale storage with OpenShift virtualization
VIKE is fully qualified for deployment with Red Hat OpenShift virtualization. InfoScale CSI StorageClasses and SnapshotClasses can be used to provision virtual machine disks that provide high performance, enterprise-level reliability, and consistent behavior across container and VM workloads.
Refer to https://www.veritas.com/support/en_US/article.100074725 to know more about configuration guidelines for OpenShift VMs.
The following is an example of a storage profile that references an InfoScale-based StorageClass and SnapshotClass to create virtual machines.
Note: The cloneStrategy can be either snapshot or clone. If snapshot is chosen as the cloneStrategy, the user must create a VolumeSnapshotClass in advance, after deploying InfoScale. Note: Creating a large number of VMs (500+) in a single batch is not recommended. We suggest creating a smaller set of VMs at a time and ensuring that each VM reaches the Running state before initiating the creation of the next batch.
Sample VolumeSnapshotClass yaml
These yamls can be found at: /infoscale-yamls-v9.1.0/infoscale-csi/dynamic-provisioning
---
 apiVersion: snapshot.storage.k8s.io/v1
 kind: VolumeSnapshotClass
 metadata:
   name: csi-infoscale-snapclass
   annotations:
     snapshot.storage.kubernetes.io/is-default-class: "true"
 driver: org.veritas.infoscale
 deletionPolicy: Delete
 parameters:
   \# (optional) Specifies the type of the snapshot to be created.
   \# If omitted, InfoScale by default creates space-optimized snapshot.
   \# Supported values: space-optimized, full-instant
    snapType: space-optimized
   \# (optional) Specifies the size of the cache volume to be created for space-optimized snapshots.
   \# If omitted, InfoScale internally chooses the cacheSize as 30% of orignial volume size.
    cacheSize: 5g
Sample StorageClass yaml:
These yamls can be found at: /infoscale-yamls-v9.1.0/infoscale-csi/storage-class-templates
---
 apiVersion: storage.k8s.io/v1
 kind: StorageClass
 metadata:
   name: csi-infoscale-sc-block
   annotations:
     storageclass.kubernetes.io/is-default-class: "true"
 provisioner: org.veritas.infoscale
 reclaimPolicy: Delete
 allowVolumeExpansion: true
 parameters:
   \# (optional) Specifies a volume layout type.
   \# Supported layouts: stripe, mirror, stripe-mirror, mirror-stripe, concat, concat-mirror, mirror-concat
   layout: "concat"
   \#nstripe: "4"
   \# (optional) Specifies the number of disk or host failures a storage object can tolerate.
   \#faultTolerance: "1"
   \# (optional) Specifies disks with the specified media type. All disks with the given mediatype are selected for volume creation.
   \# Supported values: hdd, ssd
   mediaType: "hdd"
Creating OpenShift virtual machines using InfoScale-backed storage
-
Ensure that the InfoScale cluster is deployed and healthy by running
oc get pods -n infoscale-vtas.NAME READY STATUS RESTARTS AGE
infoscale-csi-controller-84488fd788-knfgf 5/5 Running 0 17h
infoscale-csi-node-m27cc 2/2 Running 0 17h
infoscale-csi-node-mtc57 2/2 Running 0 17h
infoscale-csi-node-sk2jd 2/2 Running 0 17h
infoscale-fencing-controller-777ddd5cc8-qtjkc 1/1 Running 0 17h
infoscale-fencing-enabler-mv5wr 1/1 Running 0 17h
infoscale-fencing-enabler-pmhcb 1/1 Running 0 17h
infoscale-fencing-enabler-tb69x 1/1 Running 0 17h
infoscale-licensing-operator-bd5bd97f5-46wwh 1/1 Running 0 17h
infoscale-sds-35322-f836b69ee261cd15-gv5b2 1/1 Running 0 17h
infoscale-sds-35322-f836b69ee261cd15-lzxfr 1/1 Running 0 17h
infoscale-sds-35322-f836b69ee261cd15-zstw6 1/1 Running 0 17h
infoscale-sds-operator-d4546c849-mttwc 1/1 Running 0 17h
infoscale-toolset-35322-8988985cf-hlmws 1/1 Running 0 17h
infoscale-toolset-35322-8988985cf-kxqbv 1/1 Running 0 17h
infoscale-toolset-35322-8988985cf-njpth 1/1 Running 0 17h
[root@ocp319-ba1 asavekar]# oc get infoscalecluster -A
NAMESPACE NAME VERSION CLUSTERID STATE DISKGROUPS STATUS AGE
infoscale-vtas infoscalecluster-dev-new 9.1.0 35322 Running vrts_kube_dg-35322 Healthy 17h-
Create a StorageClass using the sample template below. Any valid StorageClass configuration from the available options can be used.Note: Make the infoscale-concat-sc StorageClass the default by adding the appropriate annotation.
---
 apiVersion: storage.k8s.io/v1
 kind: StorageClass
 metadata:
   name: infoscale-concat-sc
   annotations:
     storageclass.kubernetes.io/is-default-class: "true"
 provisioner: org.veritas.infoscale
 reclaimPolicy: Delete
 allowVolumeExpansion: true
 parameters:
   layout: "concat"
mediaType: "hdd" -
-
Run
oc create -f infoscale-concat-sc.yaml. -
Install OpenShift Virtualization Operator and create HyperConverged from UI.
Conditions:ReconcileComplete, Available, Upgradeable-
Before creating VMs, the StorageClasses within the storage profile for OpenShift Virtualization must be modified. The StorageClasses in the storage profile are copies of those defined in Step 3.
-
Navigate to OpenShift Console > Administration > CustomResourceDefinitions and search for storageprofile.

-
Click StorageProfile, then select the Instances tab. As mentioned earlier, when the OpenShift Virtualization operators were installed, copies of the StorageClasses defined in the previous section were created.

-
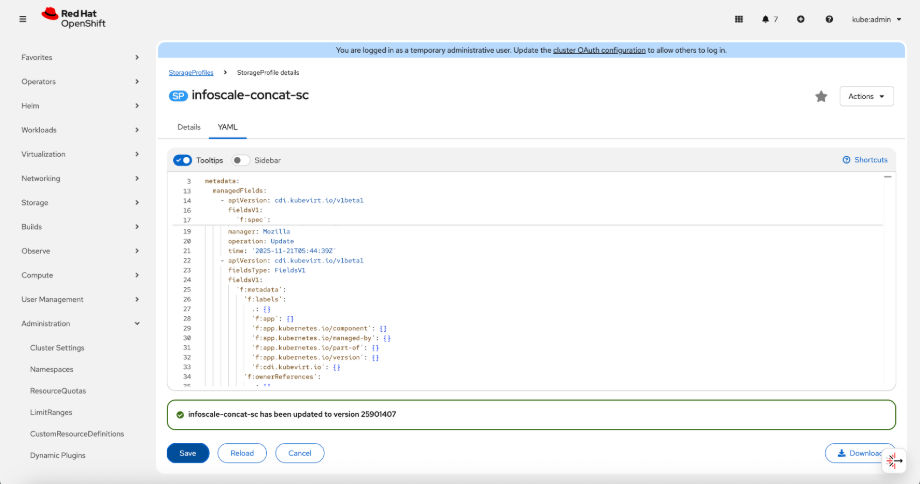
Click the StorageClass that you previously created and annotated as the default, then modify the spec section in the storageprofiles.cdi.kubevirt.io CustomResourceDefinition. Open infoscale-concat-sc, switch to the YAML tab, scroll to the bottom of the file, and delete all lines starting from spec:{} to the end. After removing them, insert the lines shown below if you want to use cloneStrategy as csi-clone.
-
spec:
   claimPropertySets:
   -  accessModes:
       -  ReadWriteMany
     volumeMode: Block
cloneStrategy: csi-clone -
Insert the lines below if you want to use cloneStrategy as snapshot. Specify the name of the VolumeSnapshotClass you created earlier in the snapshotClass field.
spec:
   claimPropertySets:
   -  accessModes:
      -  ReadWriteMany
     volumeMode: Block
     cloneStrategy: snapshot
     snapshotClass: csi-infoscale-snapclass
To create a virtual machine using InfoScale-provisioned storage, the user must select the appropriate StorageClass for both the root disk and the data disk.
-
Click Save, and then Reload.Note: After reloading, the line storageClass: infoscale-concat-sc is added again.
-
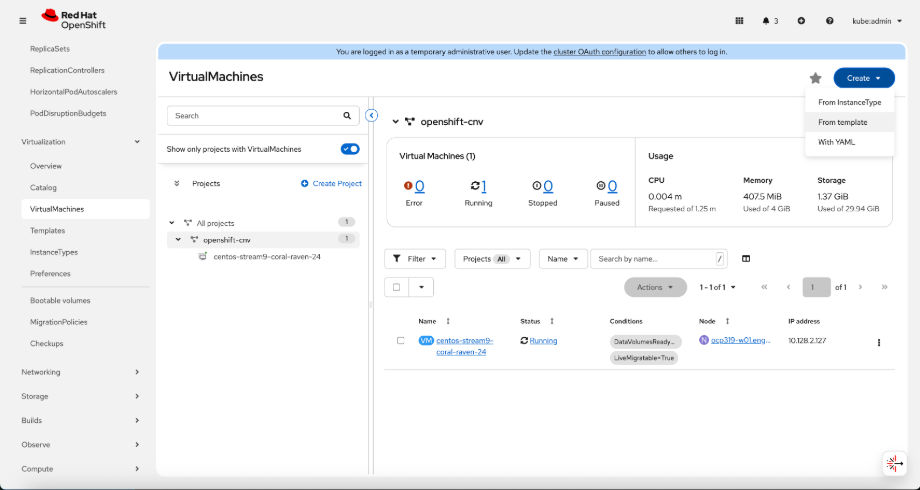
Navigate to Virtualization to create a new virtual machine.

-
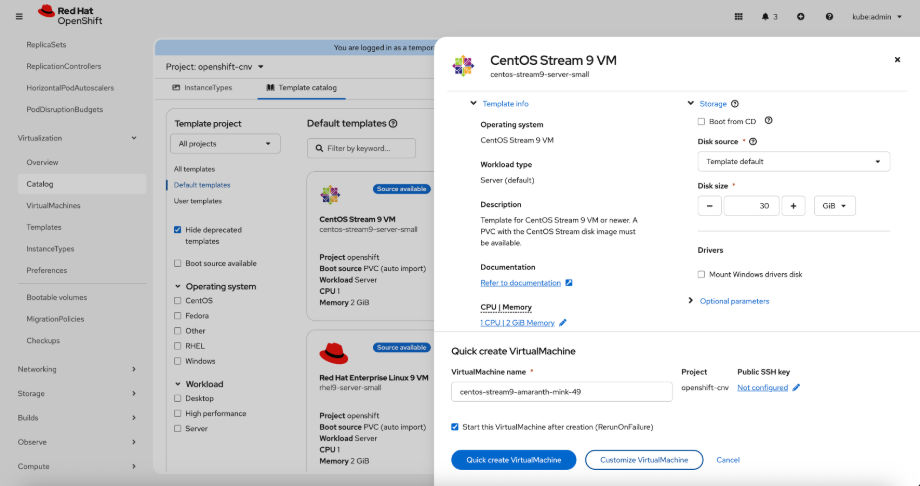
Select the boot source and click Customize VirtualMachine.
-
Go to Disks and click Edit.

-
Specify the InfoScale StorageClass for both the boot disk and the data disk, then click Save. After that, select Create VirtualMachine.
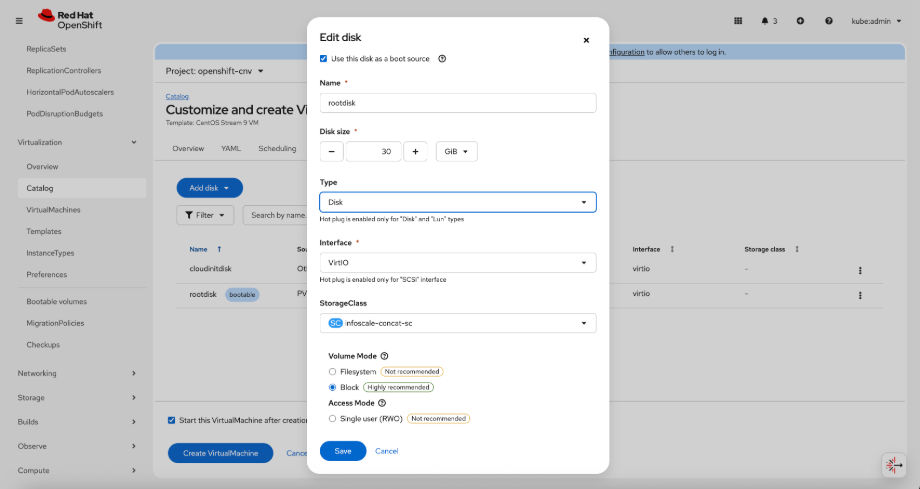
This creates a virtual machine which has InfoScale backed PVC provisioned rootdisk.
-
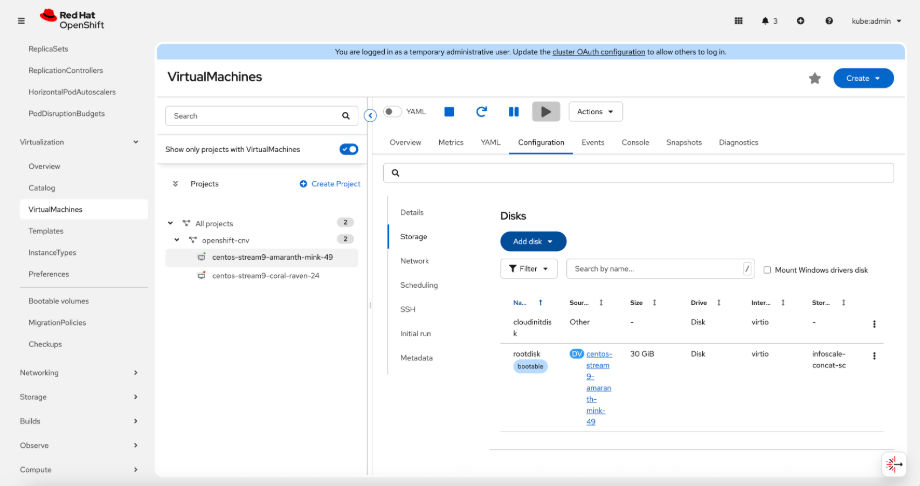
Select VirtualMmachines > Configuration > Storage > Add disk.
-
Mention the InfoScale storage class while adding the data disk.

Related information